The Inside Scoop on Heads
Like people, all mascots are different from each other. And because they’re different, they need different structures inside. Some would tell you that their method is the right method, but in reality different structures need to be considered for each mascot and each performer.
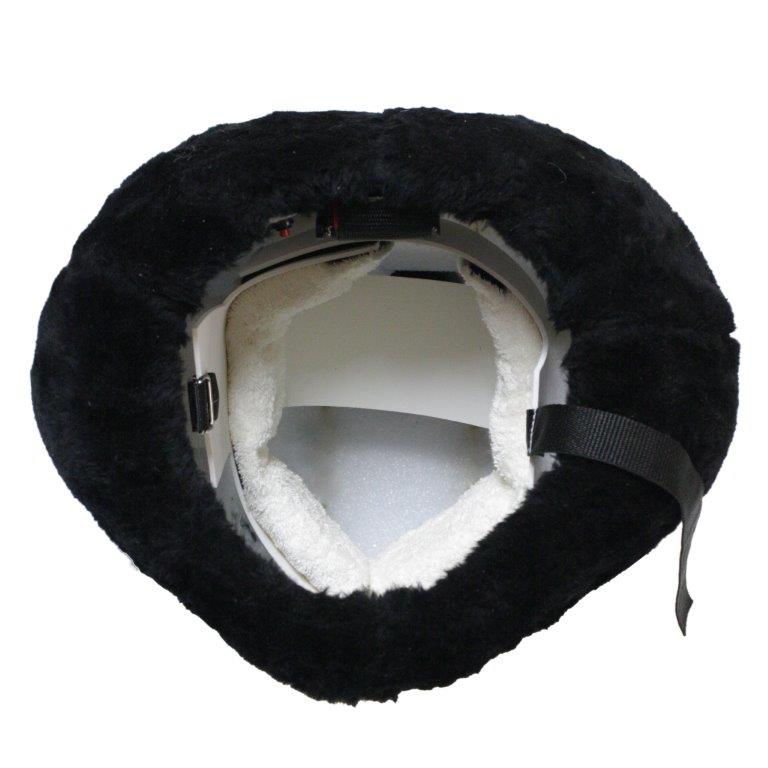
Helmet Interior
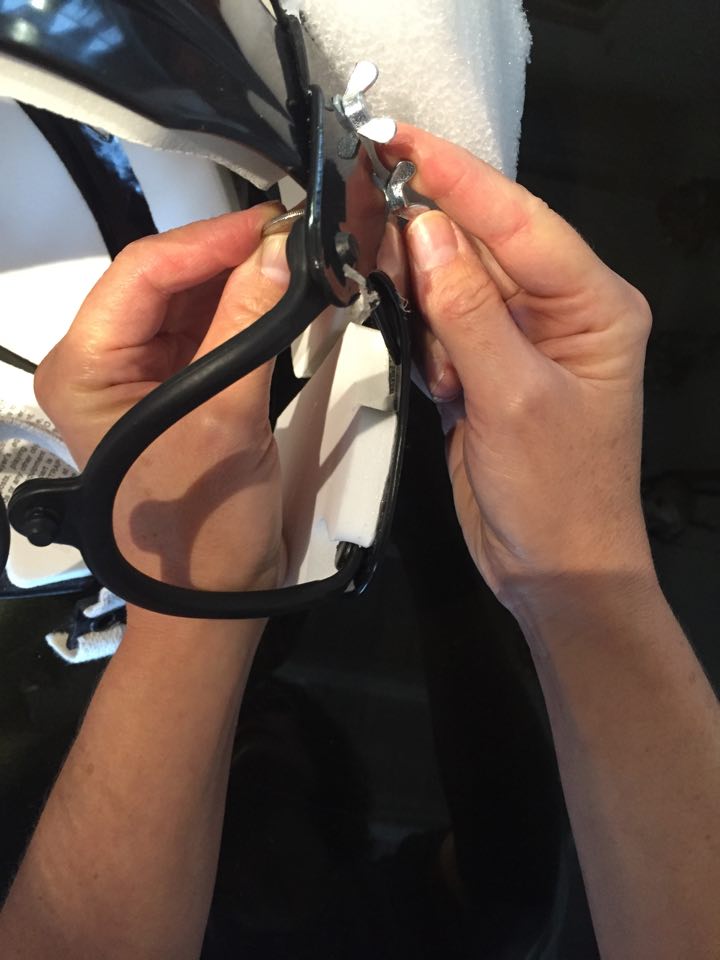
Loosening helmet wing nut
The most popular installation is a helmet. They are easy for us to install, easy to adjust for balance and vision and easy to wipe down and clean. Helmets can also be adjusted on the user’s end for a variety of head sizes. They are supportive and stable feeling for the performer. Usually each helmet will come with a stretchy chin strap attached to the sides of the helmet to help keep in in place. In some cases, we’ve even been asked to install a chip cup, but those are not necessary for every performer.
Need to adjust your helmet?
- Feel around inside your mascot’s head to find the bolt and wing nuts. They are located at the side of the helmet
- Hold the bolts steady from the inside by using a coin in the slot of the bolt
- Loosen the wing nuts on the outside of the helmet until the adjustable panel can be moved in or out – Be careful not to completely remove the bolt and wing nut – they are difficult to fit back into the holes!
- Try the head on with the loosened helmet and adjust for fit. Don’t pull it out too far or it may get too loose
- Keeping the helmet in the same position, lift it off your head and tighten the wing nuts. Remember to use the coin to hold the bolt still
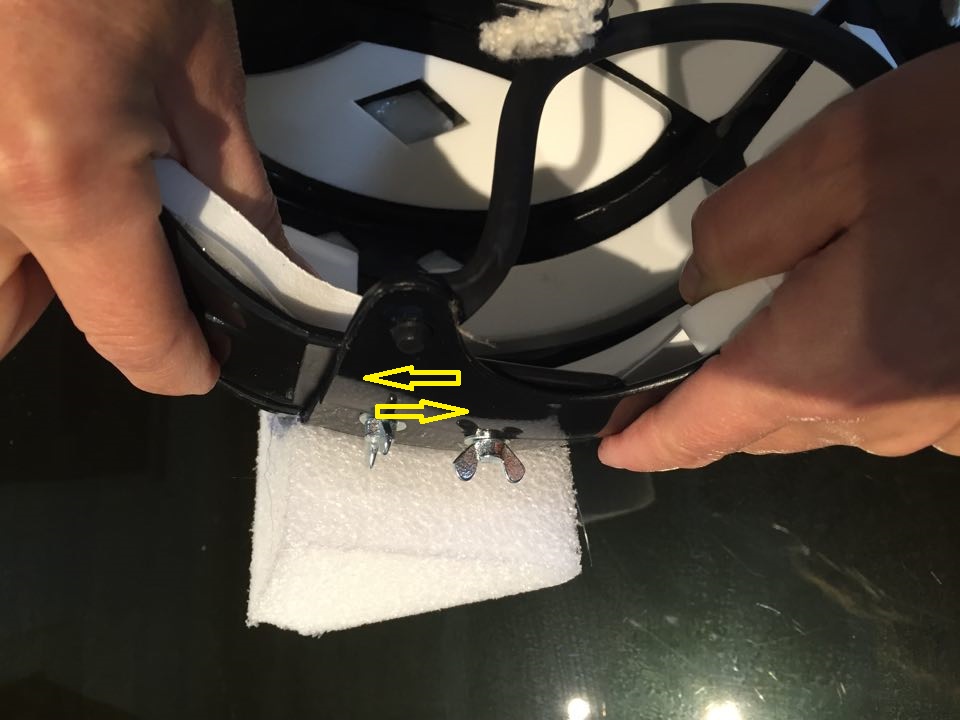
Pulling apart helmet panels
- Try it on again to make sure it didn’t slip or change position.If it did, repeat the instructions.
- The stretchy strap can now be adjusted by tightening or loosening the elastic in the buckle near either end of the snaps. If you have to remove both sides, you can do this.
Advice:
- Use a dampened cloth with dish soap & water to clean out the inside of the helmet. Not only does it cut grease but it’s less damaging to the surfaces of the helmet
- The elastic can be replaced easily by removing the strap from both sides of the helmet but remember to keep the buckles as they need to attach to the female side of the snap located on the other side of the helmet.
Halo Interior
Sometimes we’ve got a client that will be particularly vigorous in their routines. They might be doing acrobatics, performing great jumps or regularly doing leaps and flips as part of their act. In these cases we may have installed what we call a halo system. A lot of sports characters with dedicated performers choose to use this system for it adjustability, comfort and in particular, for its air flow. More of your scalp is exposed to air, making it feel less closed in than a helmet. These systems are padded with removable and absorbent liners that can be washed easily. They have a greater amount of adjustability than a helmet. Although these wouldn’t work for larger mascot heads, they are perfect for some of the medium to small sized heads. We always recommend having extra liners on hand, so you can switch them during a break especially if you have a particularly long day in the mascot.
Adjusting your halo is simple:
- Remove the liner
- Loosen the Velcro located at the back section of the system
Mascot head with halo interior
- Reattach the Velcro in a larger or smaller position, insert the liner and try it on
- Adjust again by repeating the steps if necessary
- Reinstall your liner
Advice:
- Make sure you purchase 1 or 2 extra liners in case you don’t have a chance to wash them between gigs
- And don’t forget to wash the liners! We often see that people have forgotten that the liners are removable and haven’t washed them… yuck.
Bumper Interior
That leaves us with bumpers. And while these aren’t our favorite option, they are sometimes the only choice we have when the inside of a character is particularly small. Often, these are human type characters but in every case they are used in small heads. The padded bumpers are Velcroed in strategically to accommodate the performers head and maintain vision. In their very nature, these heads can be warm as there is less air flow, and in some cases, there isn’t even room for an exhaust fan. Whew! Bumpers however, feel great and are very secure. Since the heads are small, we need to know the size of the performer’s actual head, since the size of the bumpers isn’t adjustable. So when it calls for a very small head, bumpers are the solution.
Care of Bumpers:
- Since the bumpers are Velcroed in place, they are easy to remove. Grasp each bumper individually and carefully tear out from one end of the bumper to the other.
- Hand wash or wash on gentle cycle in your washer
- Allow to air dry
- Reinstall each bumper taking care to match the line of the female side of Velcro (the loop) with the male side (the hook).
Advice:
- Don’t lose the bumpers. Your mascot won’t be very comfortable if the Velcro is rubbing against your forehead
- Give the bumpers a wash so they don’t become grimy
There is a myth out there that helmets are the ONLY professional choice for mascots, but my friends… now you are informed. It may be that helmets are the right choice for you, but for another mascot with different needs, a halo or bumper system might be a better choice. Discuss your options with your mascot provider, and make sure to find the option that works best for you!